In this article, we will learn how to setup, configure or connect Microsoft Outlook with a cPanel built-in email account. But before we move forward, it will be nice to know a few things. What’s Microsoft Outlook? Generally, Microsoft Outlook is a personal information manager software system from Microsoft, available as a part of the Microsoft Office suite. But above all, it’s an email client. An email client is an application used to download and upload messages from and to the email server. In other words, it synchronizes email messages between your email server and your computer or device for you to easily access them without logging directly into your email server to check the emails.
Need to have your cPanel Email Account password handy because you will need it.
First, locate your Microsoft Outlook Logo or Icon on your device.
At this point, we will learn how to set it up on a desktop. Setting it up on a mobile device is similar, but with some minus differences. So let’s do the desktop first.
Setup Outlook on Desktop
- To start, click on the Outlook logo/icon on your desktop or taskbar to launch Microsoft Outlook on your computer.
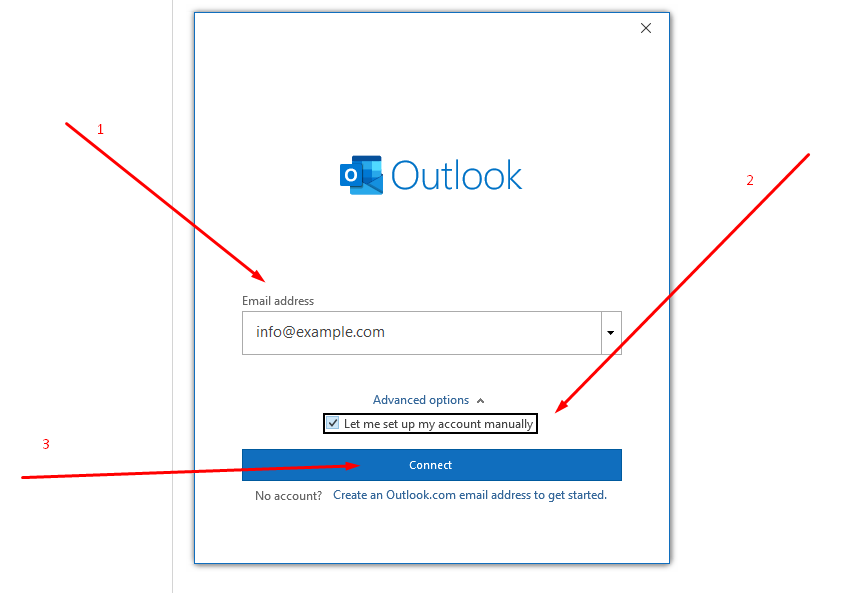
If you are launching it for the first time, you will notice that it will directly show you a window like the image showing below. And if you have already setup/configured some other email accounts on Outlook, it will also give you the option to add more email accounts.
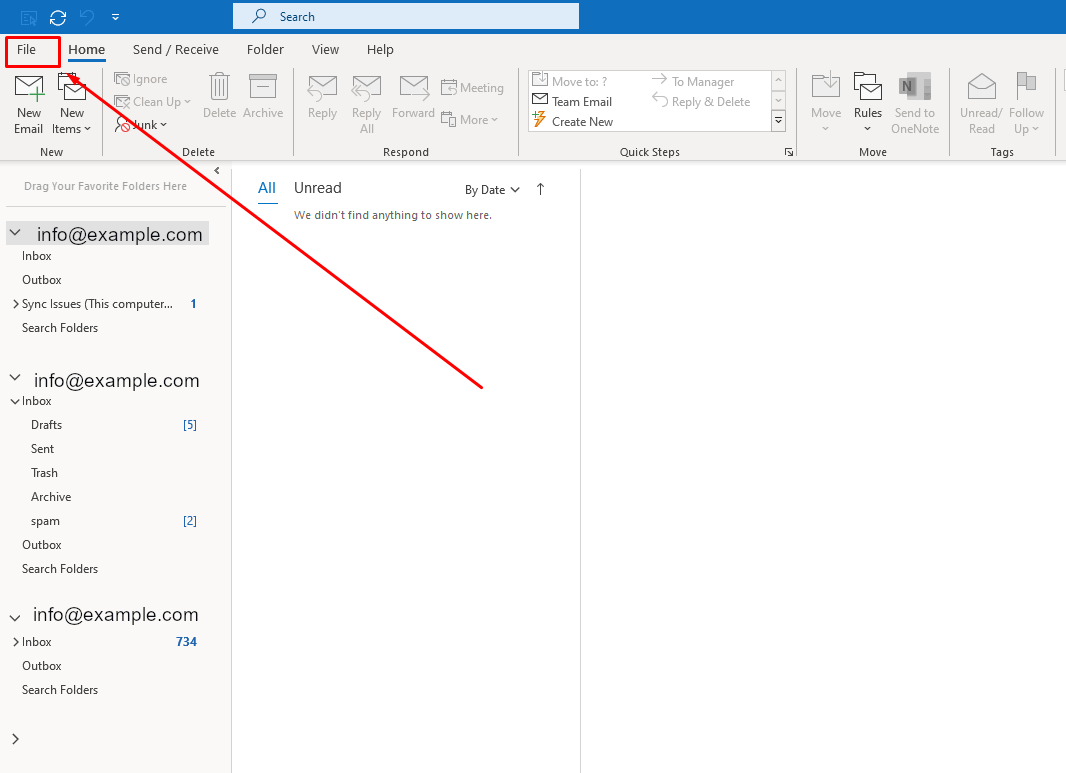
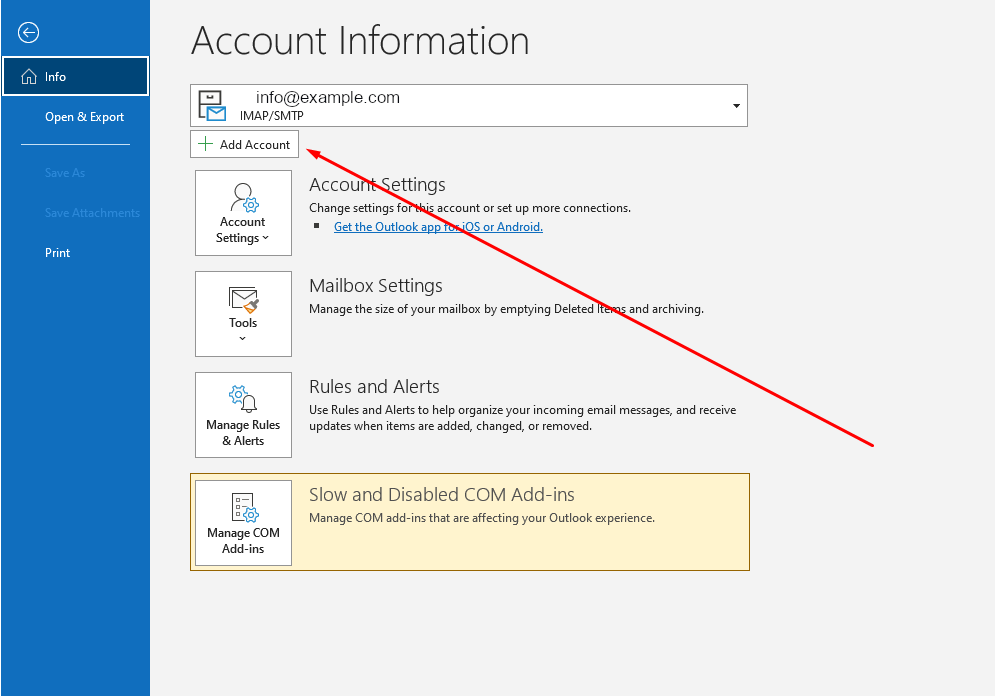
2. Click on File Menu > Add Account and it will open a window, and once it opens,
a. Enter or type your Email Address.
b. Check/Select the box, Let me set up my account manually.
c. Then click on Connect.
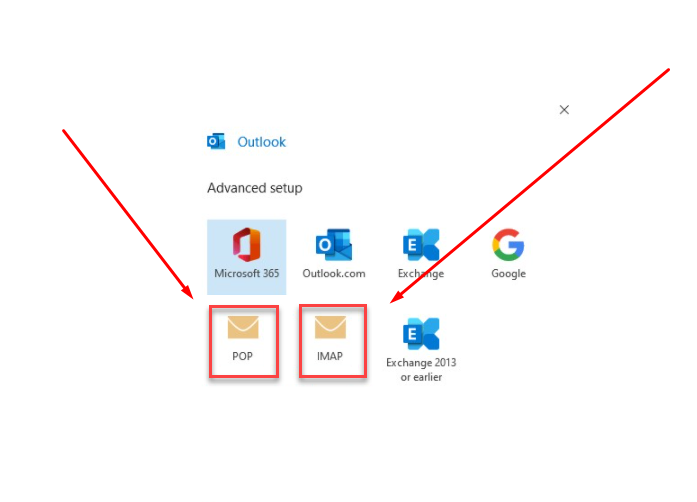
2. Select POP or IMAP depending on the Incoming Protocol you prefer. But we strongly recommend choosing IMAP. IMAP keeps your email account consistent across devices, so you never have to worry about your email accounts being out-of-date or differing from device to device. Additionally, IMAP does not delete the emails from the other accounts… It keeps them in all the email clients while synchronizing them.
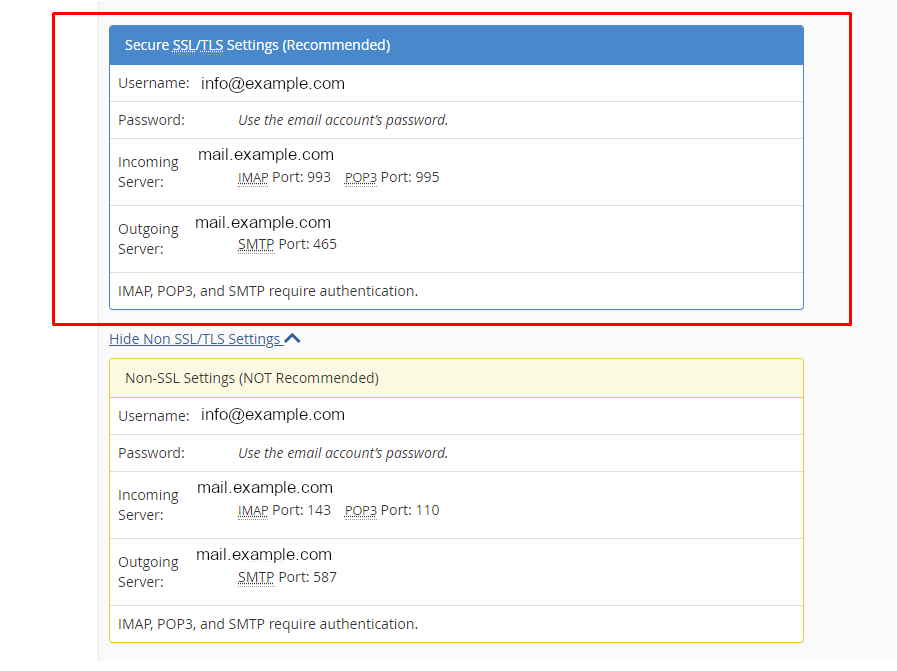
3. Check the Email Client Settings below, and based on your preferences, enter the respective hostnames, port numbers, and encryption methods for the Incoming Mail and Outgoing Mail servers. Then click on Next. We highly recommend the secure method for security reasons.
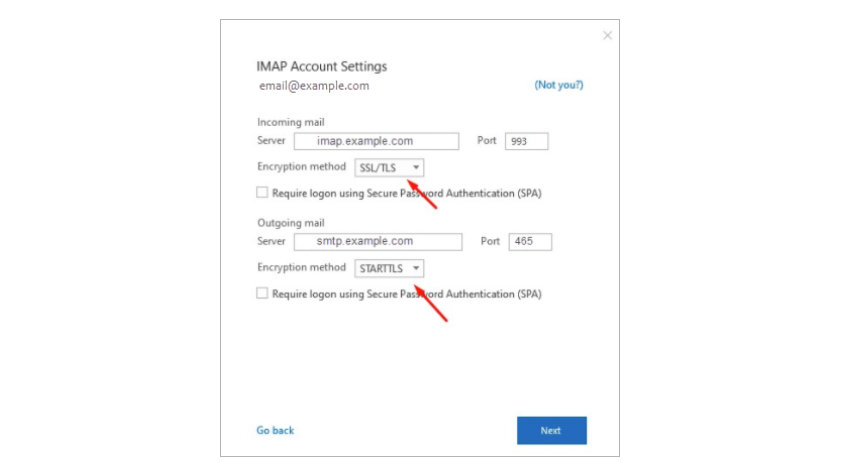
4. Enter the password for your email account and click on Connect.
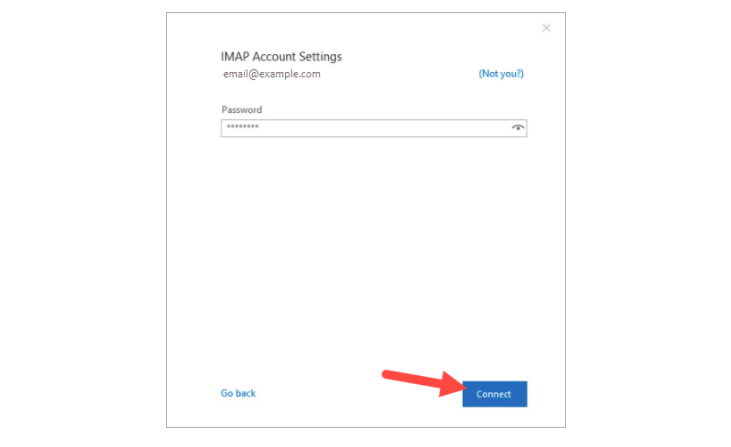
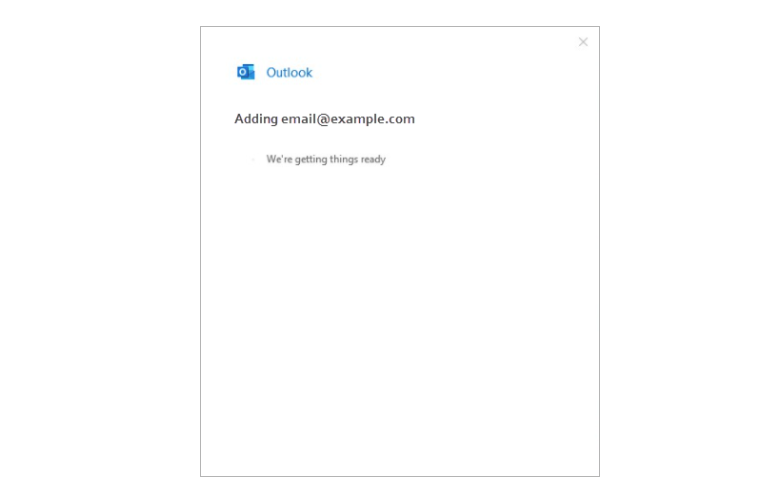
5. At this point, your email account has been successfully configured and connected to the MS Outlook Email Client! Click on Done to finish the process.
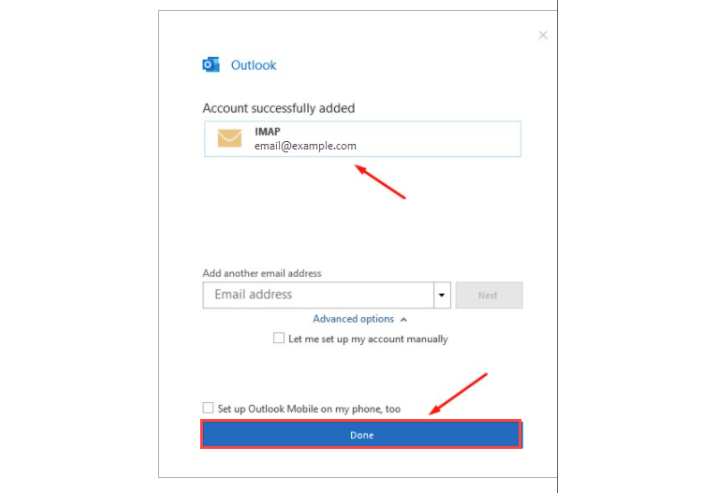
6. If everything goes well, or you successfully configure your email account with Microsoft Outlook Email Client, once you click on “Done”, it should take you to your new inbox and email tools as shown below. Then, you can send and receive emails from your MS Outlook Email Client.
